Hello everyone! I am very excited to present this article, that dives into setting up your very own Minecraft server in Azure! This post will utilize the Terraform IaC I have contributed to my friend Sam Murcio’s Minecraft project.
For more information on the Minecraft instance and background on this project. Please check out the Github repository below!
CoolTech Dad Minecraft Vending Machine
Sam’s project uses BICEP to provision the Azure resources, instead of BICEP we will set this up using Terraform. If you liked my previous post that dives into how to build a hub and spoke network with Terraform, I promise you will enjoy this.
Why Azure?
Microsoft Azure has created a fully managed Kubernetes service called Azure Kubernetes Service which is a robust, fully scalable, Kubernetes service managed for you by Microsoft. AKS simply is a turnkey solution, so instead of having to build our own internal Kubernetes environment. Meaning Azure will do all of this heavy lifting for us.
Another benefit of using a public cloud provider like Azure is adding programmability to our infrastructure deployments. We can use tools like Terraform that leverage Azure Resource Manager public APIs to provision infrastructure in a flash. In other words, it allows me to write code to create my Minecraft server with a few button presses.
Minecraft AKS affordability
I am sure you are most likely wondering at this point, what is the catch? What are the costs associated with running this in production?
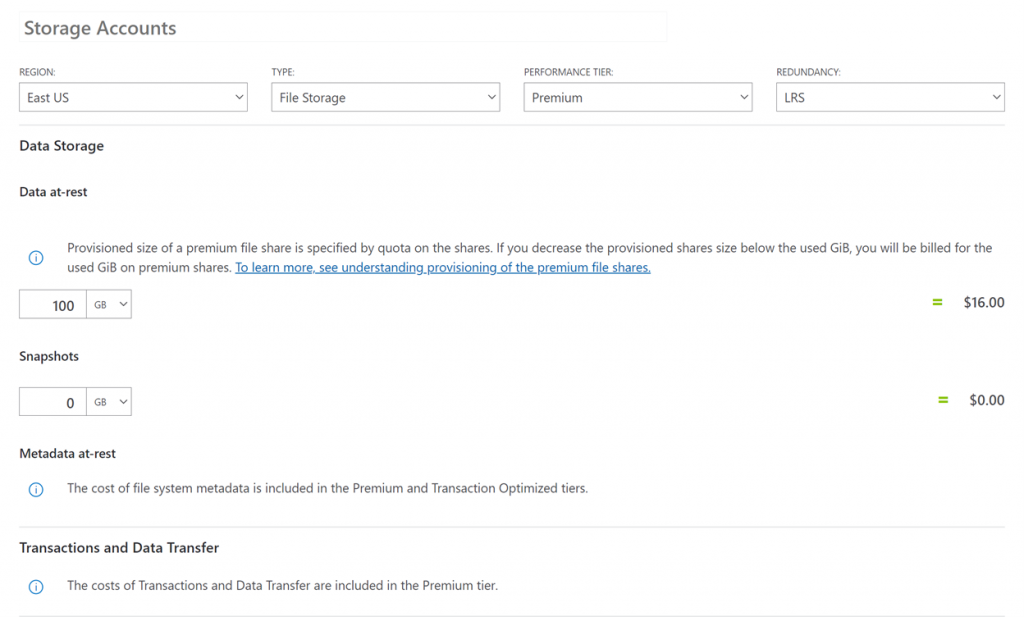
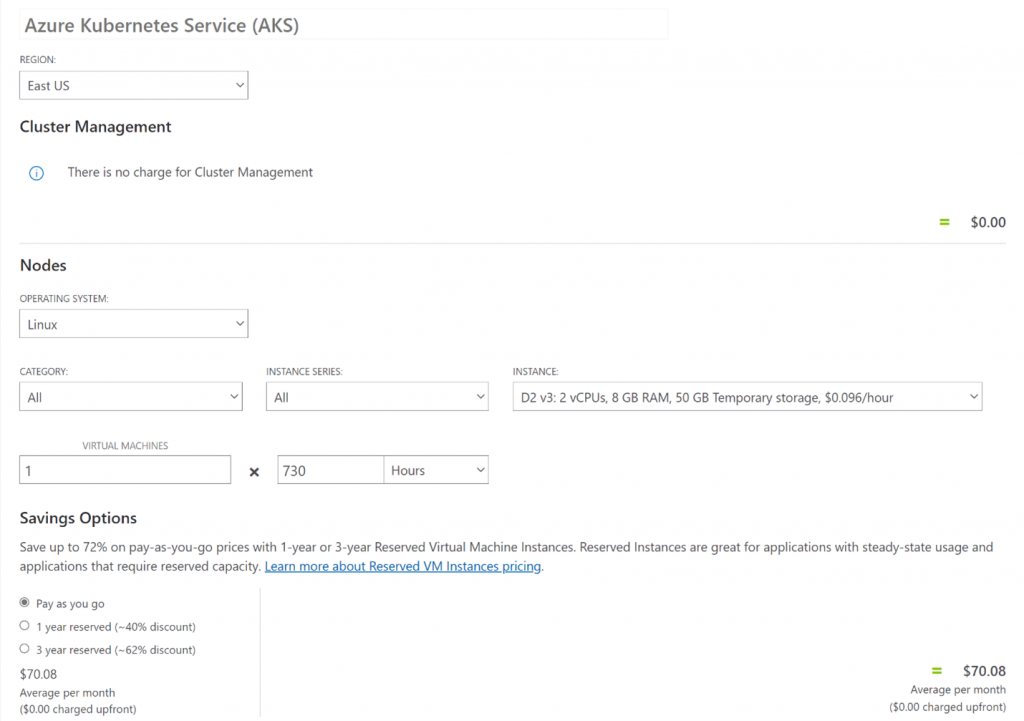
This project consists of deploying using a single b4ms VM instance on AKS, which will serve Compute/Memory for our Minecraft server. Alongside compute and memory, we also need storage. Thankfully, Azure has a service called Azure Files which is a fully managed PaaS SMB Service. This deployment sets up a 100GB Premium backed (SSD) file share for the game files, executables, etc.
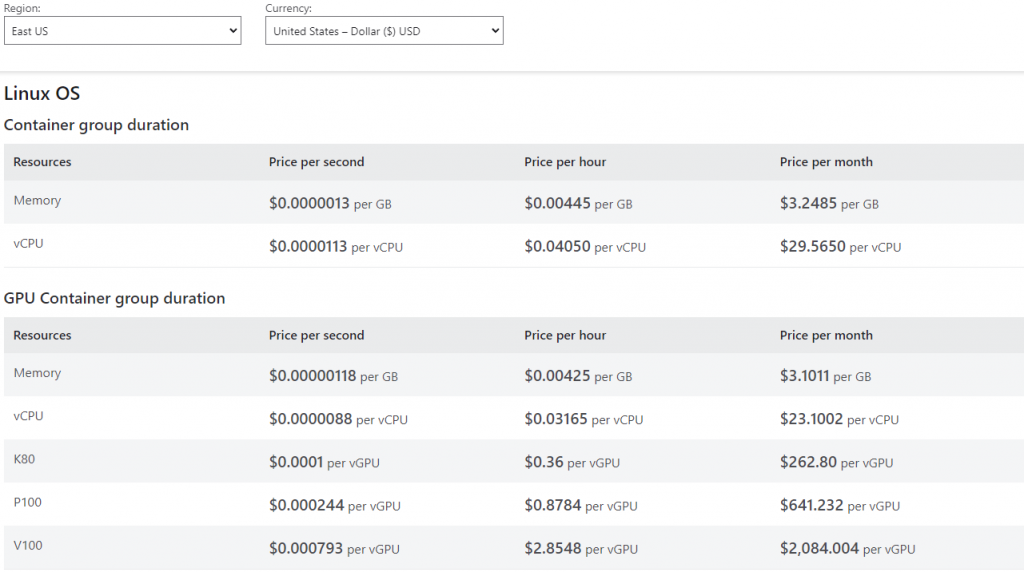
I have gone through and priced out this solution using the Azure pricing calculator, the cost of run this workload is roughly $86.00 per month running PAYG in the East US region. At roughly $0.12 per hour, this is an affordable fully PaaS service.
Prerequisites
- Azure Subscription I am using the subscription with the free $200 credit courtesy of Microsoft Dev Essentials.
- AZ CLI installed, here are the installation instructions.
- Terraform installed, instructions are located here.
- Optional, VSCode with Terraform & Git extensions.
Azure Kubernetes Deployment
Now, time for the fun part. Let’s get down to business with deploying this solution to Azure! Now go ahead and log in Azure, afterwards lets open Azure Cloud Shell, if this is your first time opening this it will ask you to provision a storage account.
Another added benefit of using Azure Cloud Shell, is that it has Git and Terraform built in natively. There is no need to have to get that installed and configured on your local system at all!
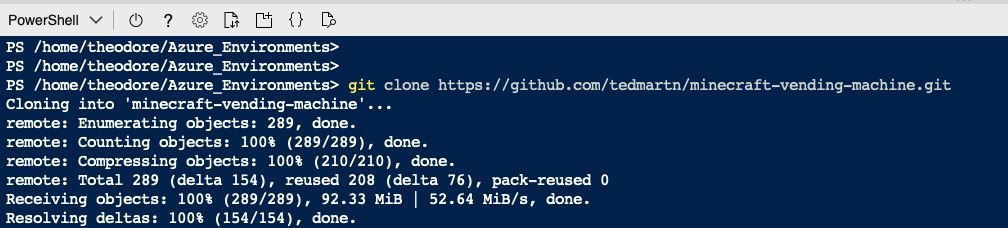
Our next step is to clone my GitHub repository that contains the necessary instructions to get this solution built out and working. Type the command below in the cloud shell to get this repository cloned.
https://github.com/cool-tech-dad/minecraft-vending-machine.git
Directory Structure
minecraft-vending-machine_folder\deploy-aks\terraform
└──main.tf
└──variables.tf
Main.tf – contains the following resources, and their dependencies.
#########################################################
### Defines Azure Resource Manager Terraform Provider ###
#########################################################
provider "azurerm" {
    version = "2.9.0"
    features {}
}
#########################################################
##### Defines the Random string generator Provider ######
#########################################################
terraform {
  required_providers {
    random = {
      source = "hashicorp/random"
      version = "2.3.0"
    }
  }
}
#########################################################
##### Defines the Random string generator Provider ######
#########################################################
resource "random_string" "dns_prefix" {
  length  = 8
  special = false
  upper   = false
}
#########################################################
######### Creates Azure Resource Group ##################
#########################################################
resource "azurerm_resource_group" "useast-minecraftaks-rg" {
  name = var.resource_group_name
  location = var.resource_location
}
#########################################################
######### Creates Azure Virtual Network #################
#########################################################
resource "azurerm_virtual_network" "useast-aks-vnet" {
    name = var.minecraftaks_vnet_name
    address_space = ["192.168.0.0/16"]
    location = azurerm_resource_group.useast-minecraftaks-rg.location
    resource_group_name = azurerm_resource_group.useast-minecraftaks-rg.name
}
#########################################################
######### Creates Azure Subnet tied to VNET #############
#########################################################
resource "azurerm_subnet" "useast-aks-subnet" {
    name                 = var.minecraftaks_subnet_name
    resource_group_name  = azurerm_resource_group.useast-minecraftaks-rg.name
    address_prefixes     = ["192.168.1.0/24"]
    virtual_network_name = azurerm_virtual_network.useast-aks-vnet.name
}
#########################################################
######### Creates Azure Kubernetes Cluster ##############
######### 1 Minecraft Container is Created ##############
########## 2 CPU and 8 GB Memory Allocated ##############
#########################################################
resource "azurerm_kubernetes_cluster" "useast-minecraft-aks" {
  name = var.useast-minecraft-aksname
  location = azurerm_resource_group.useast-minecraftaks-rg.location
  resource_group_name  = azurerm_resource_group.useast-minecraftaks-rg.name
  dns_prefix = var.dns_prefix
  kubernetes_version = var.kube_version


  linux_profile {
    admin_username = var.admin_username
    ssh_key {
      key_data = file(var.ssh_public_key)
    }
    }
   default_node_pool {
     name = "default"
     node_count = 2
     vm_size = "standard_d2s_v4"
     os_disk_size_gb = "30"
     vnet_subnet_id = azurerm_subnet.useast-aks-subnet.id
   }


   identity {
     type = "SystemAssigned"
   }


   network_profile {
     load_balancer_sku = "standard"
     network_plugin = "kubenet"
   }
}
Variables.tf – contains hardcoded values for specific variables inside of the main.tf file.
variable "resource_location" {
description = "Please input resource location"
}
variable "kube_version" {
type = string
default = "1.20.9"
}
variable "admin_username" {
description = "Please enter the usernameyou would like for the for the AKS cluster"
}
variable "ssh_public_key" {
default = "id_rsa.pub"
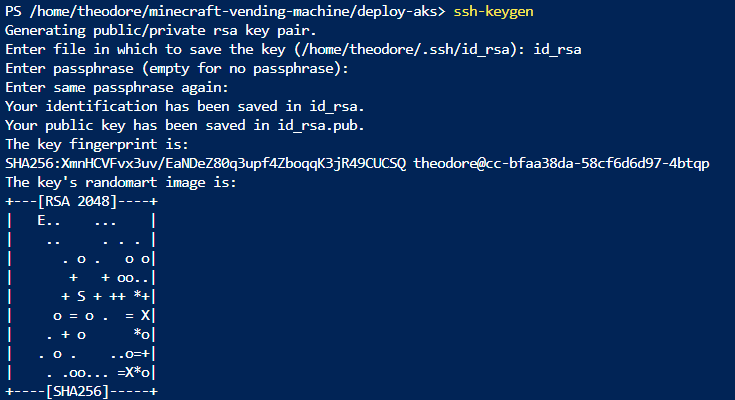
}Next step, a certificate is necessary in order to provision the AKS cluster. This along with the username will allow you to authenticate into your AKS cluster and is required for deployment.
ssh-keygen id_rsa.pub
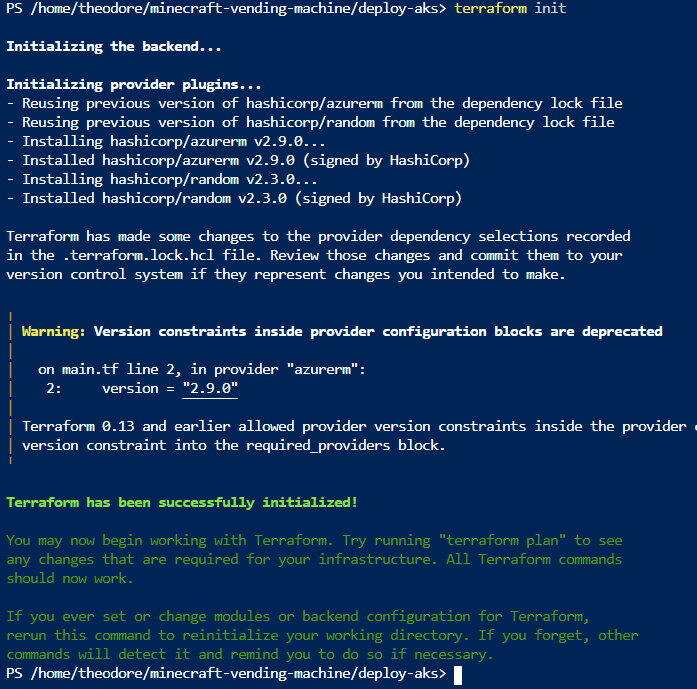
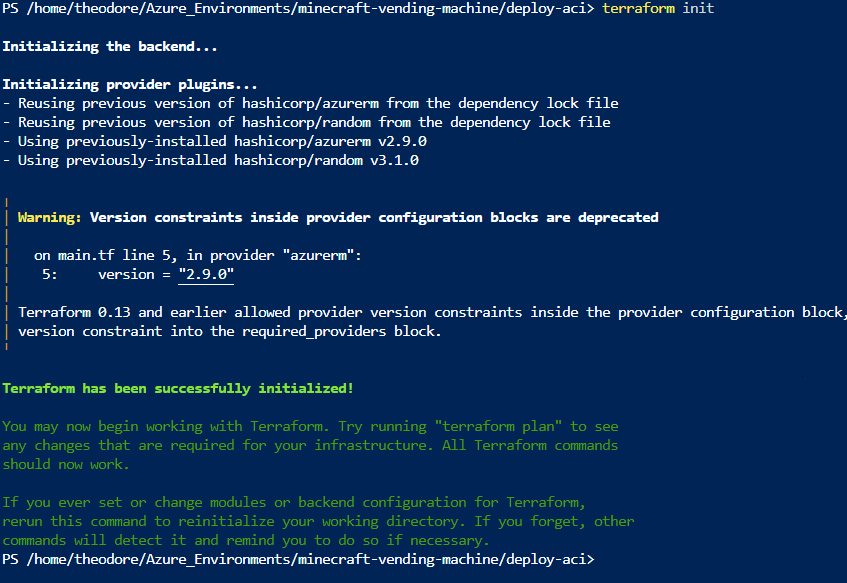
Okay, now that the GitHub repo is cloned, and the key is generated. The next step is to initialize Terraform, the command to accomplish that is terraform init.
You ready? It is now time for deployment. Let’s get this AKS cluster provisioned for our Minecraft instance. First step in this process is Terraform Plan.
Upon running this command, you will be prompted for two variables. Username/Location of resource. As you can see in my example, I used tedmartin and eastus.

The terraform plan command verifies that the code syntax is correct and whether or not this will result in a successful deployment. However, I have seen instances in which this is incorrect and a Terraform Apply run will fail.
However, that isn’t happening THIS time. (Hopefully not, if you do happen to run this and it fails, please let us know.)
The next command is Terraform Apply along with the –auto-approve flag this will apply our Terraform configuration to our Azure subscription.
terraform apply –auto-approve
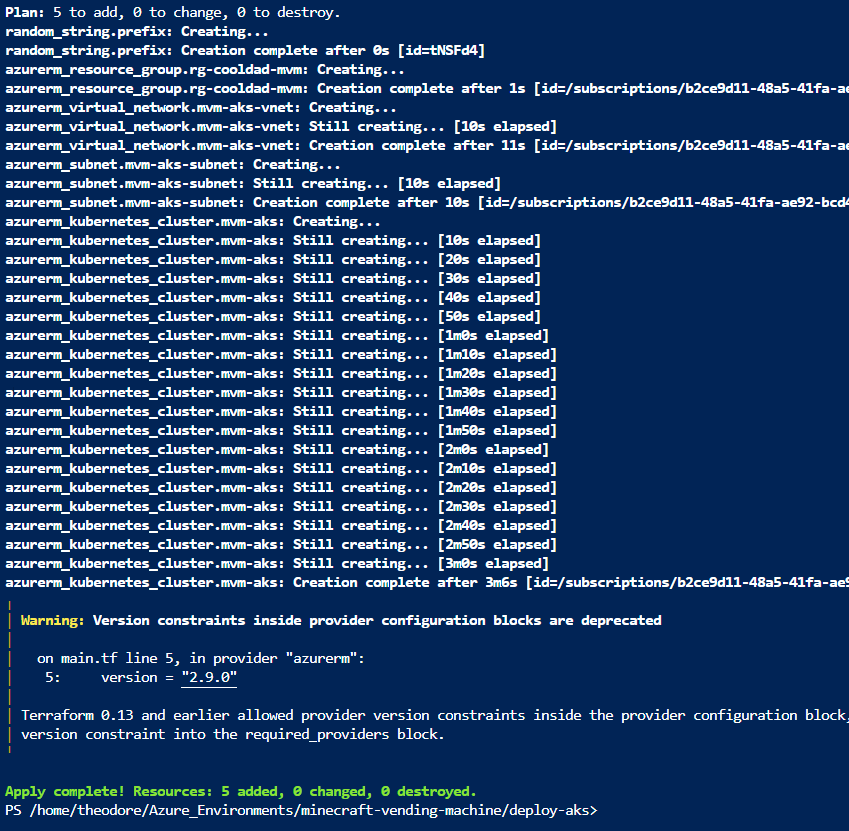
Heck yes, you did it! The AKS Cluster is built and nearly ready for our Minecraft container. The next step in this process is to deploy some persistent storage.
First step lets authenticate into our AKS Cluster. Remember the AKS name that you saved earlier? This is why I told you it would come in handy!
az aks get-credentials –resource-group rg-cooldad-mvm –name
To provision this for AKS run the below command.
kubectl apply .\azure_files_pvc.yaml
kind: StorageClass
apiVersion: storage.k8s.io/v1
metadata:
name: sc-azure-files
provisioner: kubernetes.io/azure-file
reclaimPolicy: Retain
volumeBindingMode: Immediate
mountOptions:
- dir_mode=0777
- file_mode=0777
- uid=1000
- gid=1000
- mfsymlinks
- cache=strict
- actimeo=30
parameters:
skuName: Premium_LRS
---
apiVersion: v1
kind: PersistentVolumeClaim
metadata:
name: pvc-001
spec:
storageClassName: sc-azure-files
accessModes:
- ReadWriteMany
resources:
requests:
#storage: 5Gi #standard_lrs storage type
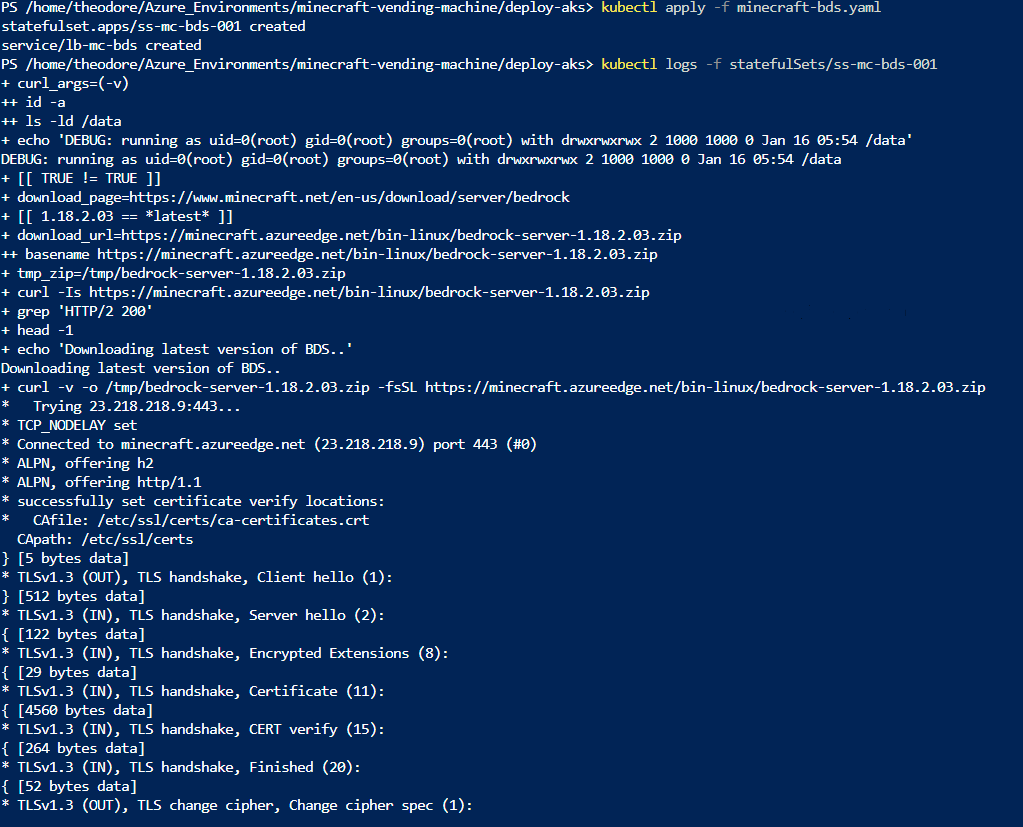
storage: 100Gi #premium_lrs storage typeOkay, now we can FINALLY deploy our Minecraft server. This last command will tell Kubernetes to run the Minecraft Server YAML file. Afterwards we will run the logging command to see the logs directly in the terminal to verify that our server is up and running.
kubectl apply -f .\minecraft-bds.yaml
kubectl logs -f statefulSets/ss-mc-bds-001
Can you feel the excitement in the air?! We did it! Now we need to connect to this server. Within this YAML file we told Kubernetes to provision us a Public facing load balancer. Let’s query that service for the IP address.
kubectl describe service lb-mc-bds
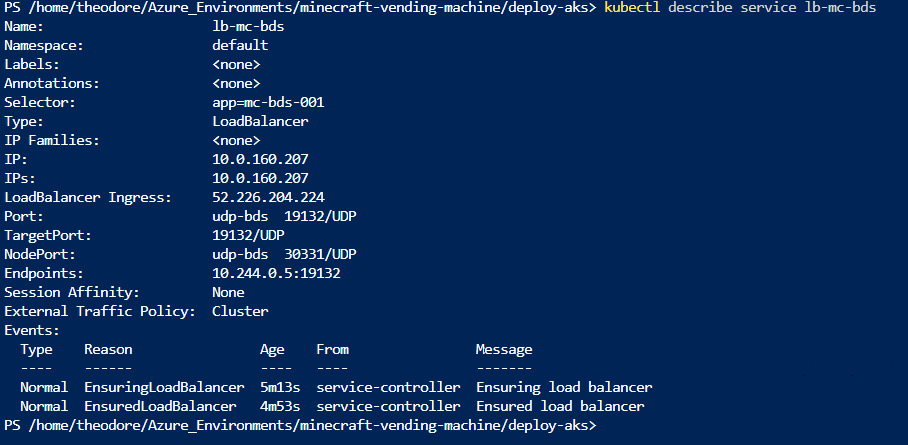
Now that we have the inbound public IP address, we can finally connect to the server with our Minecraft client on port 19132.
You did it, Minecraft on Azure containerized within a managed Kubernetes instance!
Why Azure Container Instances?
Azure Container Instances comes in play with a true CaaS service. If you do not need all the bells and whistles of K8’s this is the solution for you. ACI also drastically simplifies the deployment & connect process compared to AKS.
Another added benefit is that our Terraform deployment is all we need to get this set-up. Persistent storage, server configuration is built into the Terraform code.
Azure Container Instances Cost
Another added benefit of ACI is the cost, with ACI you truly pay for what you use with memory utilization & vCPU being charged on a per second basis..
Directory Structure
minecraft-vending-machine_folder\deploy-aci
└──main.tf
└──variables.tf
Main.tf – contains the following resources, and their dependencies.
#########################################################
### Defines Azure Resource Manager Terraform Provider ###
#########################################################
provider "azurerm" {
    version = "2.9.0"
    features {}
}
#########################################################
##### Defines the Random string generator Provider ######
#########################################################
resource "random_string" "prefix" {
  length           = 6
  special          = false
}
#########################################################
######### Creates Azure Resource Group ##################
#########################################################
resource "azurerm_resource_group" "rg-cooldad-mvm" {
  name = "rg-cooldad-mvm"
  location = var.resource_location
}
#########################################################
######### Creates Azure Storage Account #################
#########################################################
resource "azurerm_storage_account" "aci-storage" {
  name = "mvmsta${lower(random_string.prefix.result)}"
  resource_group_name = azurerm_resource_group.rg-cooldad-mvm.name
  location = azurerm_resource_group.rg-cooldad-mvm.location
  account_tier = "Premium"
  account_replication_type = "LRS"
  account_kind = "FileStorage"
}
#########################################################
######### Creates 100GB Azure File Share#################
#########################################################
resource "azurerm_storage_share" "aci-share" {
  name = "pvc-mc-001"
  storage_account_name = azurerm_storage_account.aci-storage.name
  quota = 100
}
#########################################################
######### Creates Azure Container Instance Group ########
########## 1 Minecraft Container is Created #############
########### 1 CPU and 2 GB Memory Allocated #############
#########################################################
resource "azurerm_container_group" "cooldad-mvm-cg" {
  name = "mvmaci${lower(random_string.prefix.result)}"
  location = azurerm_resource_group.rg-cooldad-mvm.location
  resource_group_name = azurerm_resource_group.rg-cooldad-mvm.name
  ip_address_type = "public"
  dns_name_label = "aci${lower(random_string.prefix.result)}"
  os_type = "Linux"


  container {
    name = "minecraft"
    image = "docker.io/cooltechdad/minecraft-bds:0.5"
    cpu = "1"
    memory = "2"
    ports {
      port = "19132"
      protocol = "UDP"
    }
    environment_variables = {
      "debug" = "true",
      "bds_version" = "1.18.2.03",
      "eula" = "TRUE",
      "level_name" = "Bedrock level",
      "gamemode" = "creative",
      "difficulty" = "normal",
      "allow_cheats" = "false",
      "max_players" = "1000",
      "server_authoritative_movement" = "server-auth-with-rewind"
    }
    volume {
      name = "pv001"
      mount_path = "/data"
      storage_account_name = azurerm_storage_account.aci-storage.name
      storage_account_key = azurerm_storage_account.aci-storage.primary_access_key
      share_name = azurerm_storage_share.aci-share.name
    }
  }


  depends_on = [
    azurerm_storage_account.aci-storage,
    azurerm_storage_share.aci-share
  ]
}
#########################################################
########### Creates some useful outputs #################
###### this provides ease of use for connectivity #######
#########################################################
output "container_ip_address" {
  value = azurerm_container_group.cooldad-mvm-cg.ip_address
}
output "contain_dns_name" {
  value = azurerm_container_group.cooldad-mvm-cg.dns_name_label
}
variables.tf – contains hardcoded values for resources in main.tf.
variable "resource_location" {
  description = "Please input resource location"
}
Azure Container Instances Deployment
Are you ready for the easiest deployment ever? Let’s rock this out. First off, like every Terraform deployment lets run Terraform Init.
Now for the moment of truth, let’s do this.
Run terraform apply –auto-approve to get this deployed!
You will be prompted for the location of the resource, in this example I have chosen eastus.
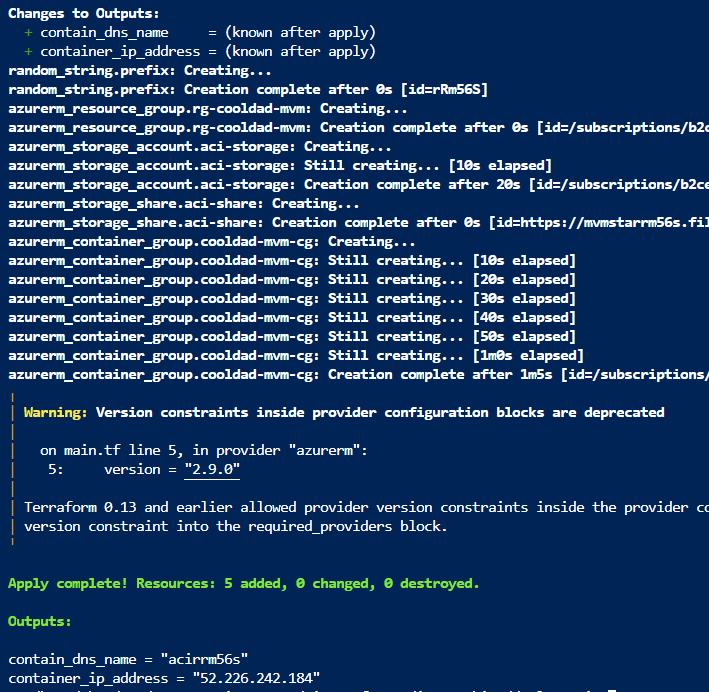
As you can see, we have deployed the container group with 1 container with the above Public IP address.
I advise to give this around 2-3 minutes for the Minecraft server to get up and running. The best way to verify this is to navigate to the container via the portal and pull up the logs.
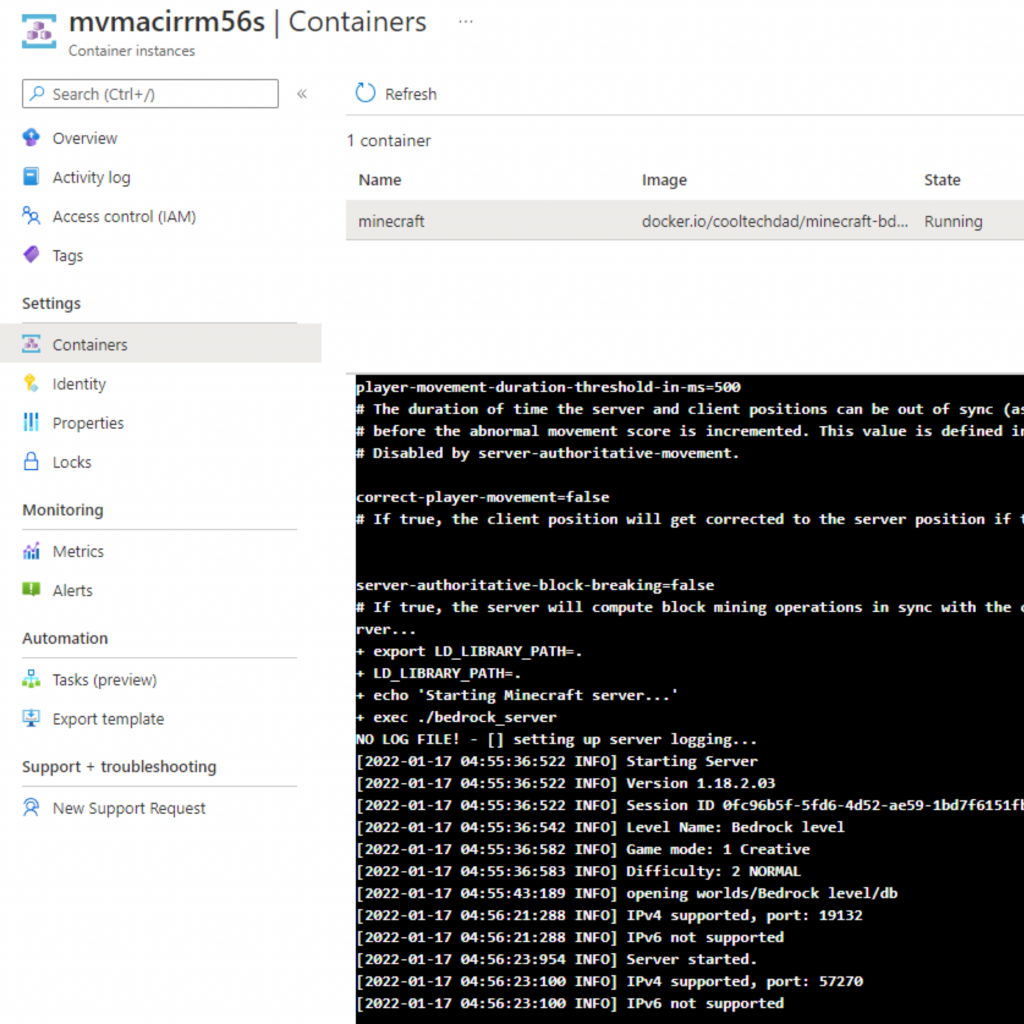
You did it! We have now successfully deployed Minecraft via Azure Container Instances. So have fun and enjoy the Minecraft playground.
Teardown
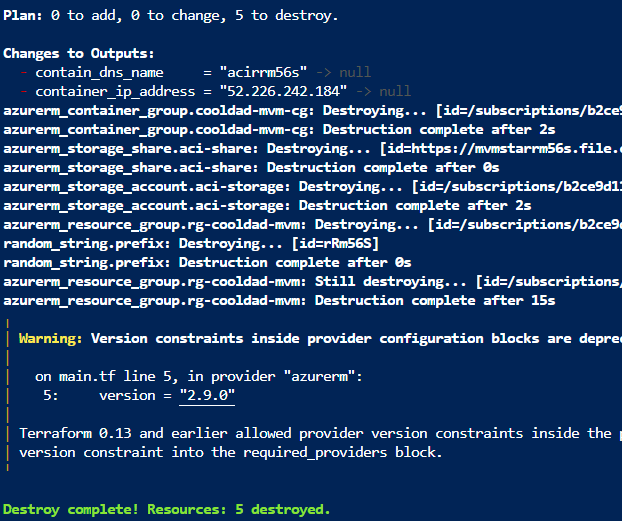
Now for a huge benefit that Terraform provides for our deployments. A very simple way to destroy infrastructure when we are done with it.
That is Terraform Destroy, since Terraform stores all changes in a state file. This allows it to remember what has been built, and easily remove it from the environment.
When you are ready, run the below command to remove the ACI or AKS deployment from the Azure environment.
terraform destroy –auto-approve
Wrap Up
I have to say this was a very fun project to dig into, and I hope to continue to make it better with consistent contributions moving forward.
I hope you enjoyed this post and if please let me know if you have any questions. Take care.
Thanks,
Ted